
Are you looking for a website.com tutorial? If so, you have come to the right place. In this article, I will show you how to create a website using website.com.
Website.com is a free website and online store builder.
Website.com provides many amazing features:
- Free Web Hosting.
- Free Domain Name.
- Free E-commerce.
- Free Drag and Drop Builder.
Here is the massive list of Free Website Builder
Contents
- How to Create a Website using Website.com?
- Step 1: Go to Website.com
- Step 2: Click on Get Started For Free
- Step 3: Choose Plan
- Step 4: Sign up to Website.com
- Step 5: Give your Website Name
- Step 6: Accept Terms and Conditions
- Step 7: Start Building My Website
- Step 8: Click on Login
- Step 9: Edit Your Website
- Step 10: Choose Site Type
- Step 11: Choose Template
- Step 12: Design and then Publish
- Conclusion:
How to Create a Website using Website.com?
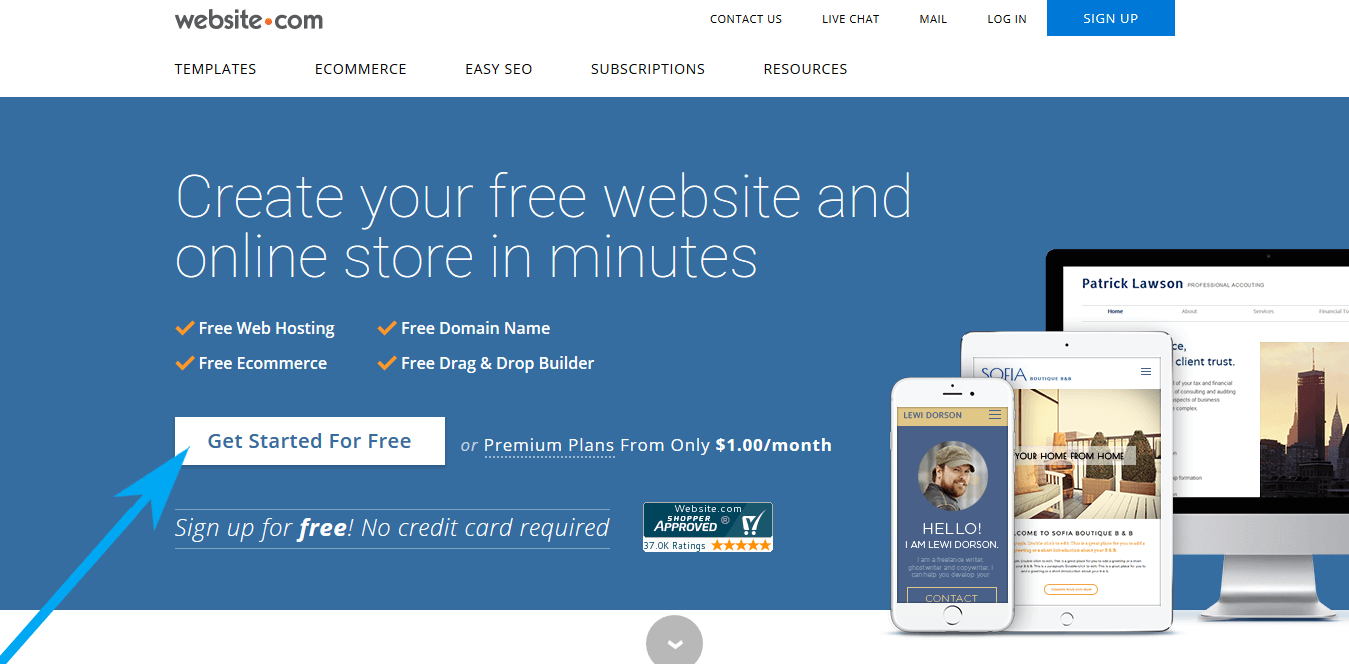
Step 1: Go to Website.com
The first step is to visit the website.com

Step 2: Click on Get Started For Free
“The second step is to click on the “Get Started for Free” button when you are on the website.com homepage. This button is located in the middle left of the page.
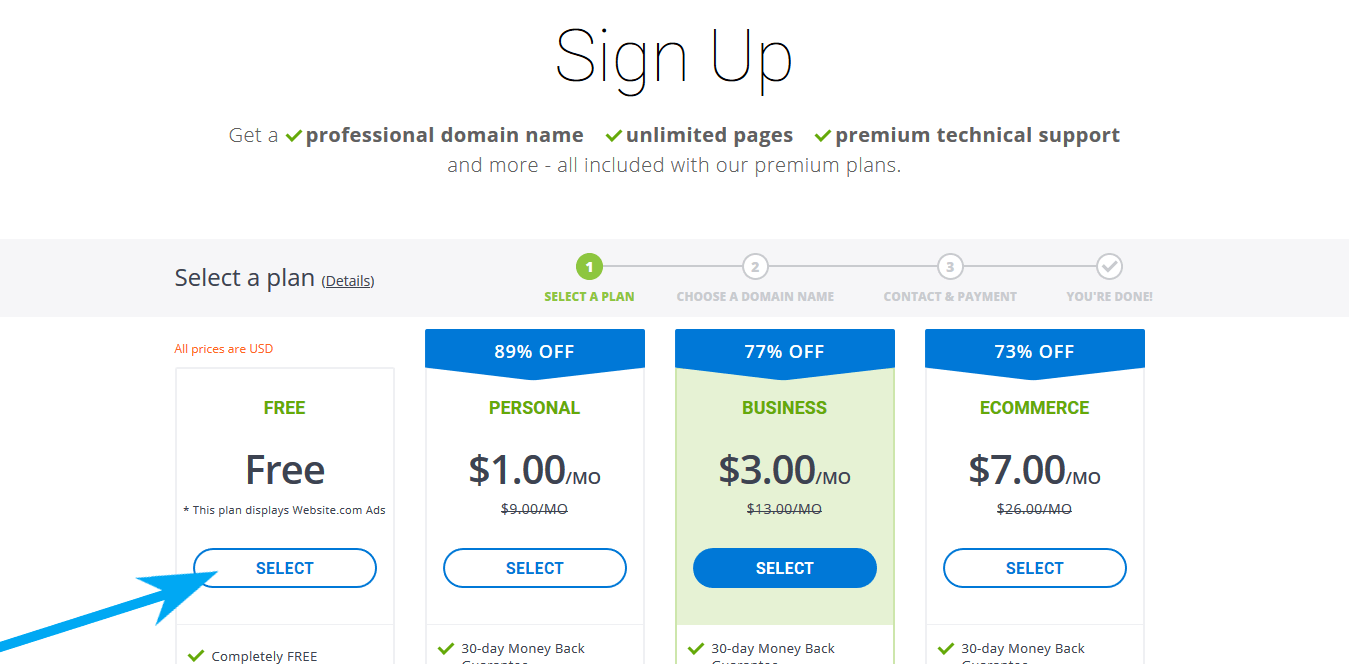
Step 3: Choose Plan
The third step is to choose a plan. If you want to build a website for learning, choose the free plan. If you want to build a website for earning money or any business-related purpose, I suggest you go with the premium plan. I know most visitors choose the free plan, so I will also go with the free plan for learning purposes.
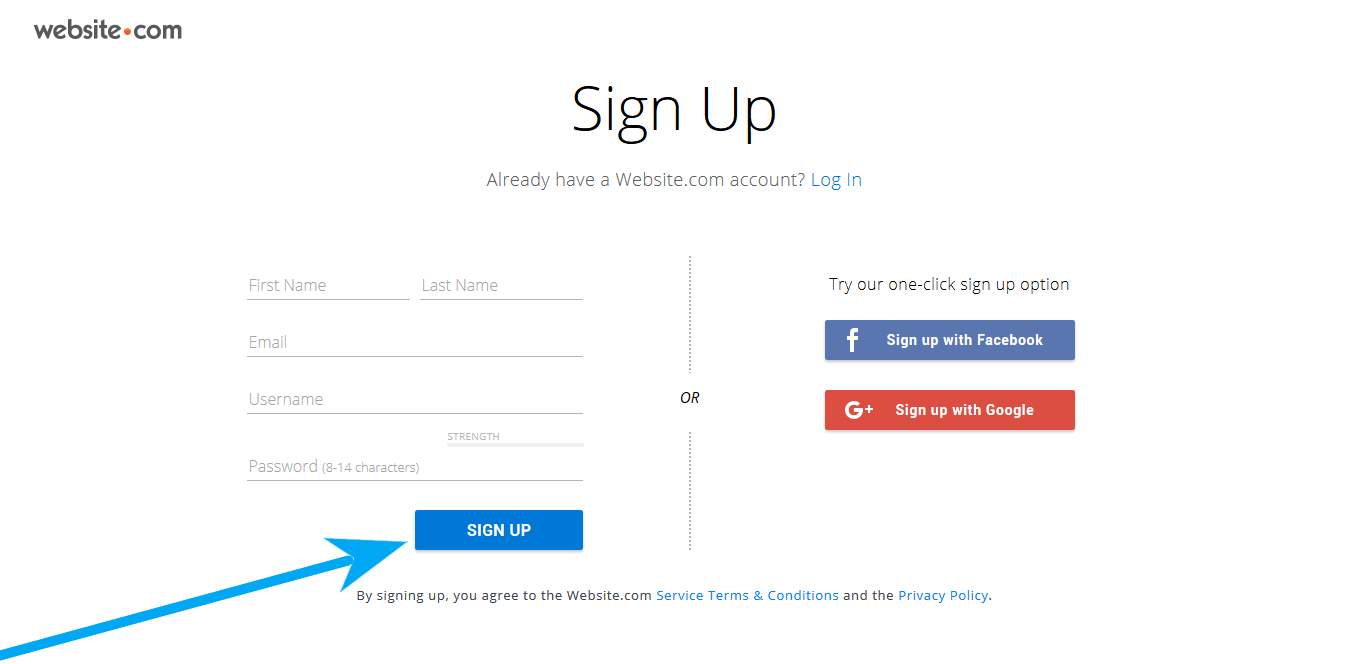
Step 4: Sign up to Website.com
The fourth step is to sign up to website.com to build a website. Add your basic details (name, email, username, and password) to complete the sign-up process.
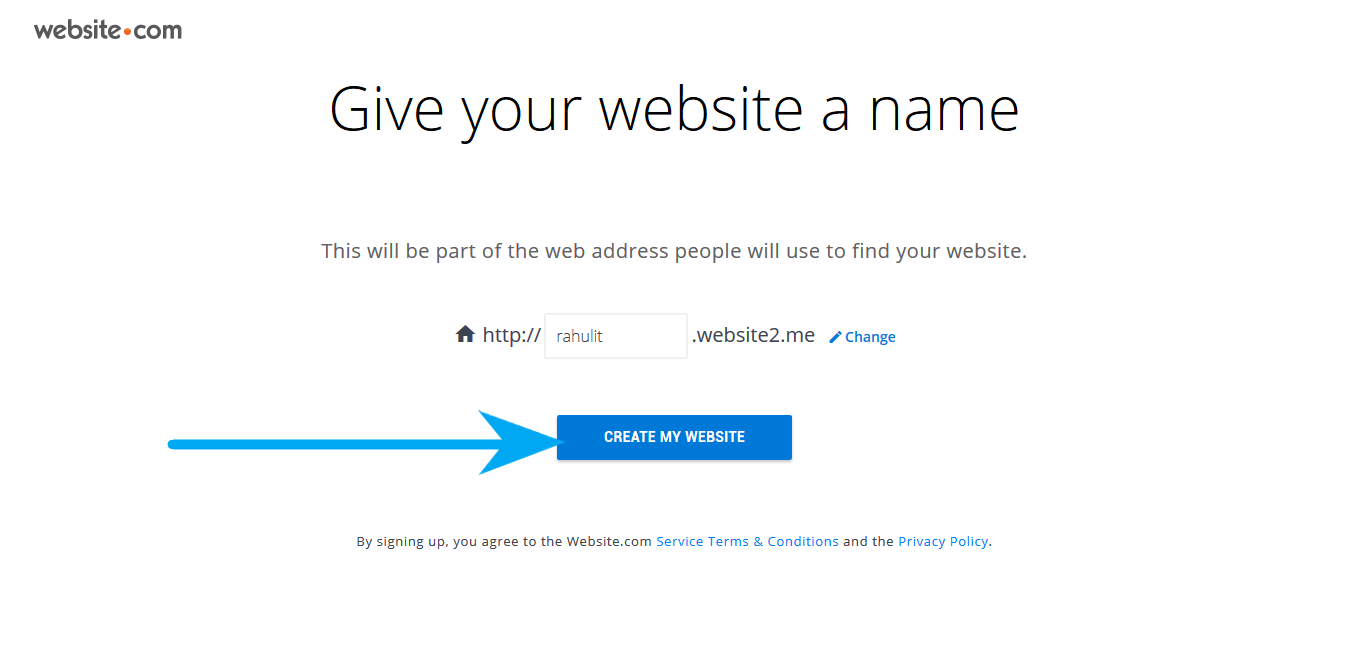
Step 5: Give your Website Name
The fifth step is to add your website name/URL and then click on the “Create My Website” button
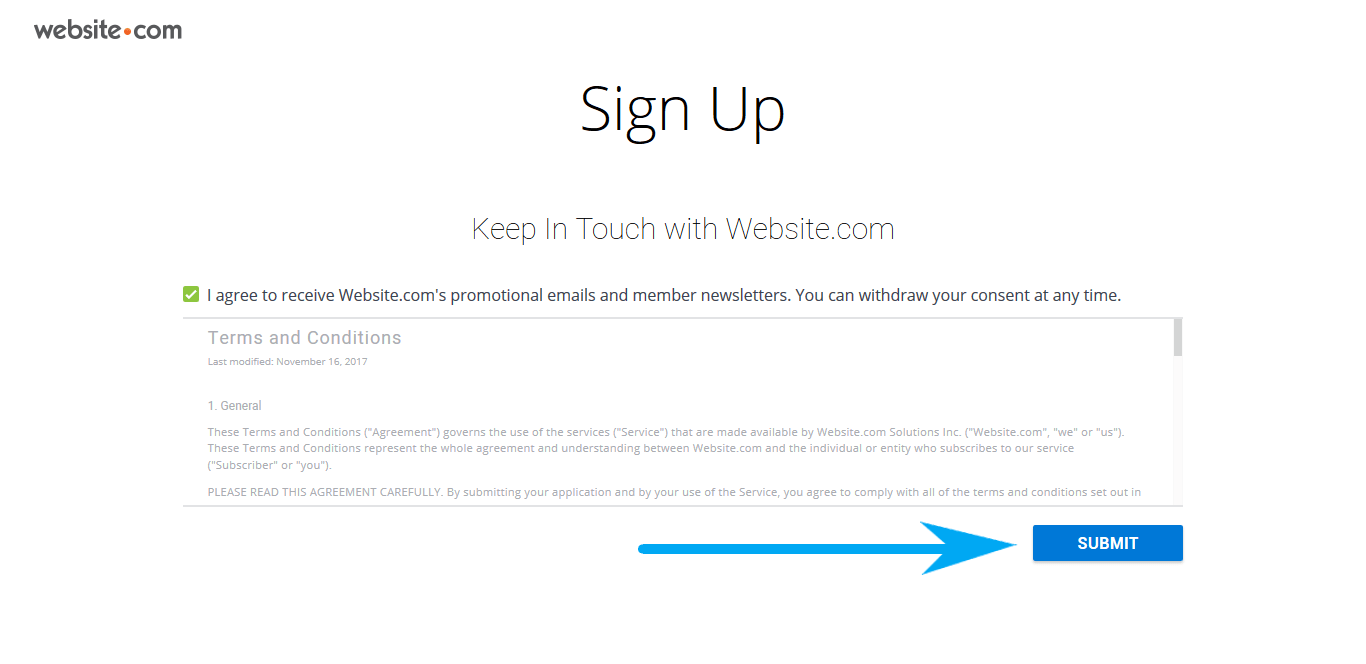
Step 6: Accept Terms and Conditions
The sixth step is to accept the terms and conditions. Check the box and then click on the “Submit” button.
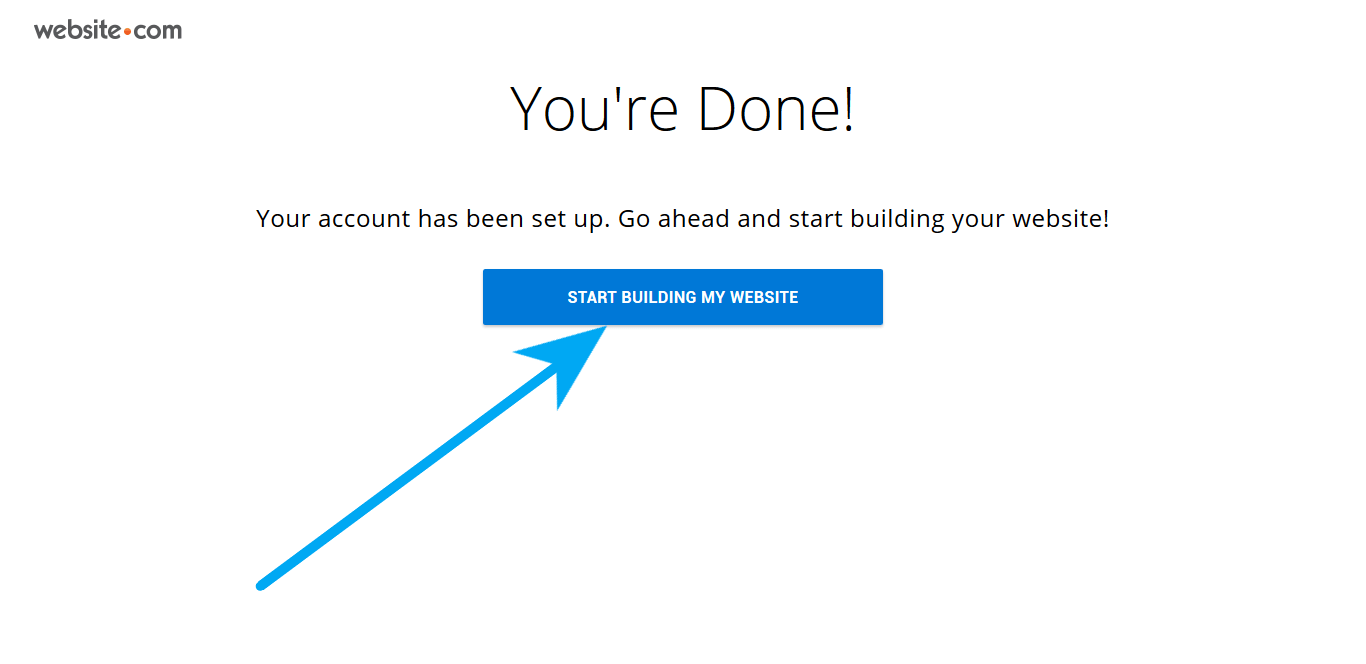
Step 7: Start Building My Website
The seventh step is to click on the “Start Building My Website” button after accepting the terms and conditions.
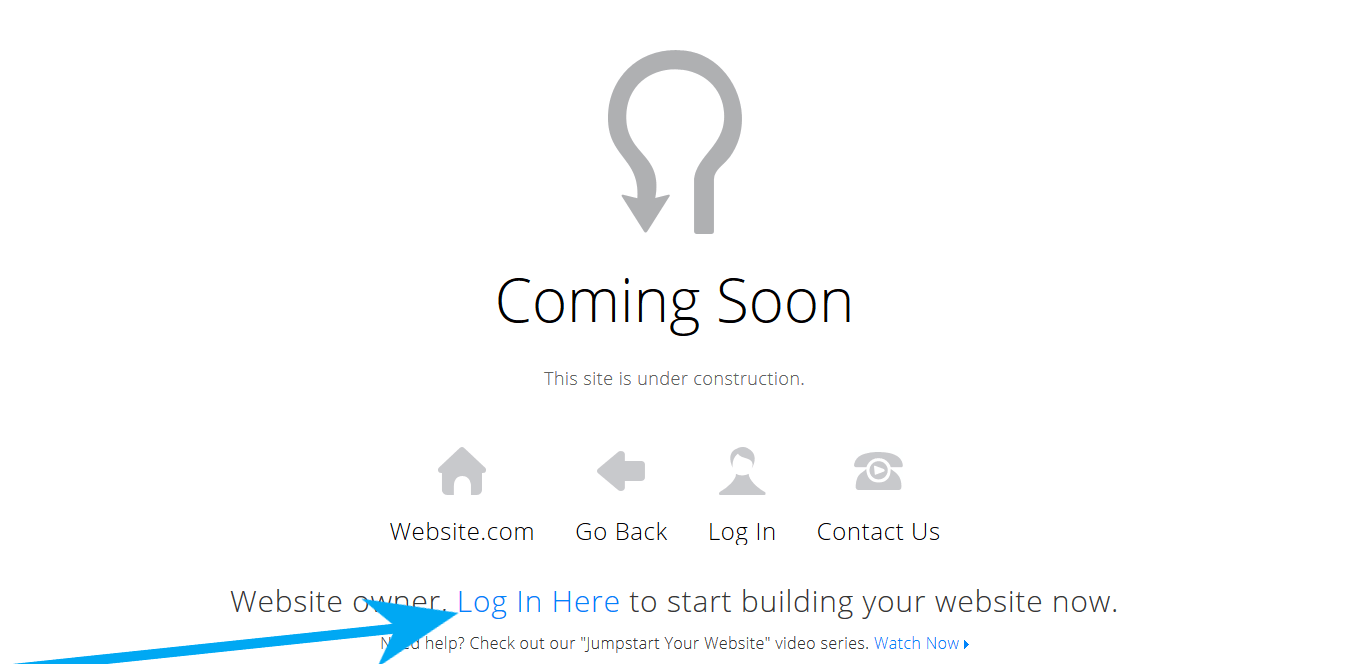
Step 8: Click on Login
The eighth step is to click on the “Login” button to start building the site.
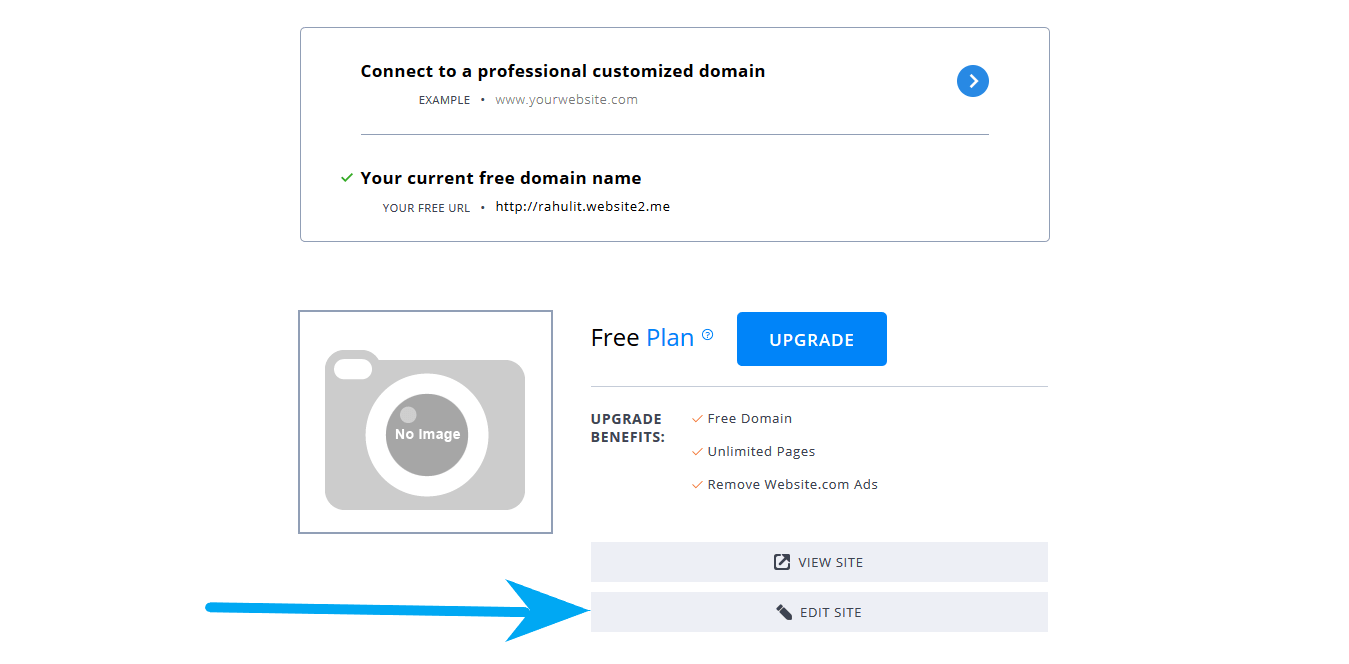
Step 9: Edit Your Website
The ninth step is to click on the “Edit Site” button after logging in to website.com.
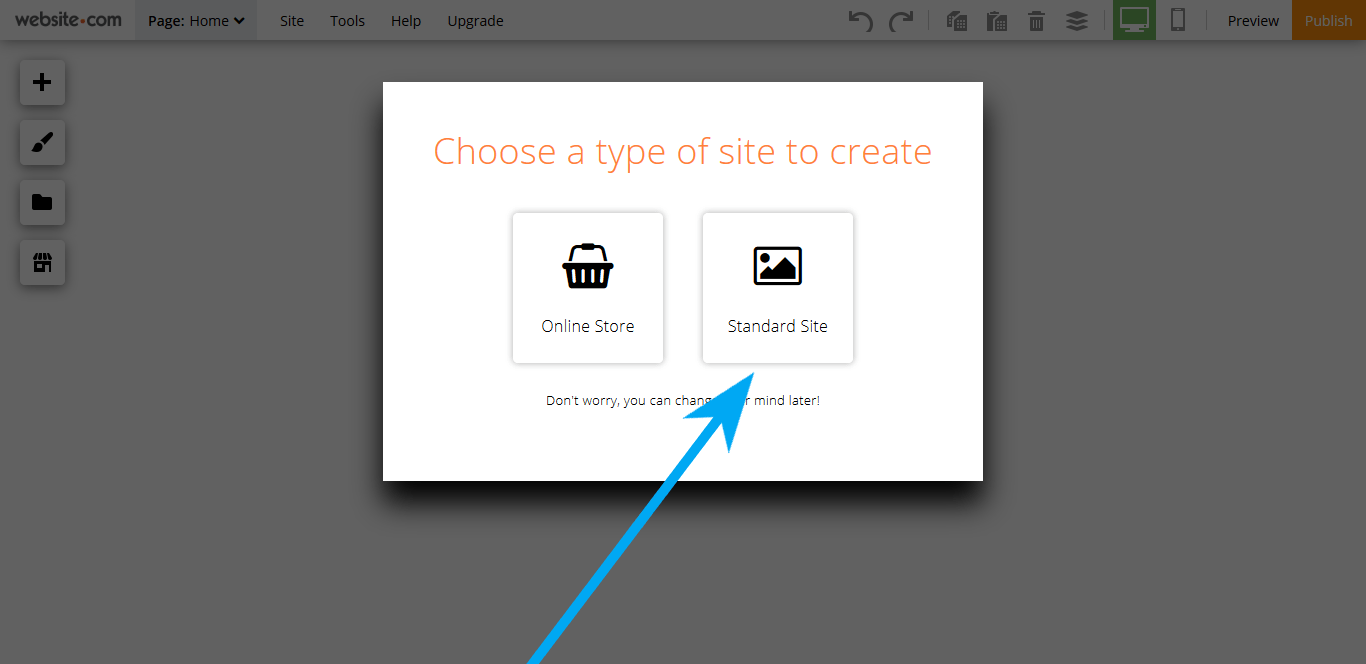
Step 10: Choose Site Type
The tenth step is to select the type of site you want to create. If you want to build a normal site, choose the “Standard Site” button.
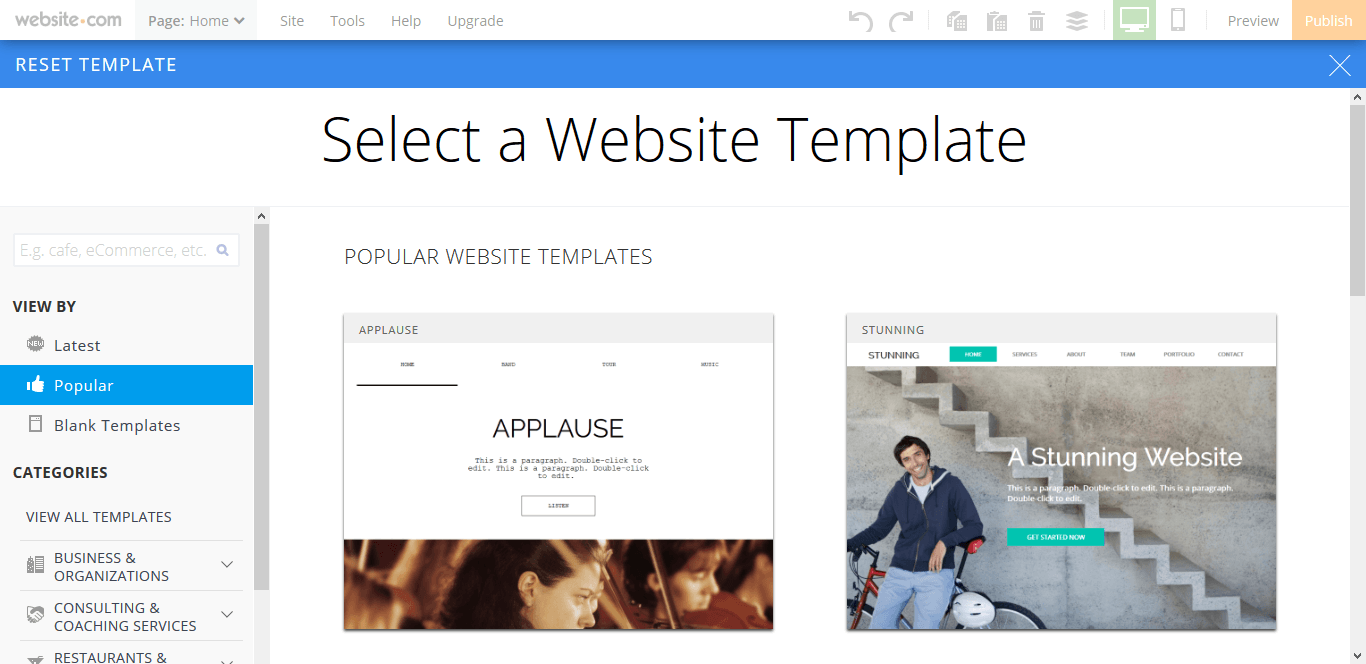
Step 11: Choose Template
The eleventh step is to choose a template for your website.
Step 12: Design and then Publish
The twelfth step is to design the template according to your needs and then click on the “Publish” button.

Conclusion:
If you follow all of these steps, you should be able to create a website using website.com without any issues. If you have any issues related to this article, feel free to leave a comment below
Last updated on January 9th, 2023
Very useful blog. Also good learning blog.
Thank you, sir, for sharing.
Okay
Informative and very helpful content, Thanks for sharing
Okay